How To Install WordPress Plugins (Beginner’s Guide)

Want to install a WordPress plugin but not sure how?
No problem. We’ve got you covered.
In this post, you will learn how to install a WordPress plugin using several different methods.
Exactly which method you choose will depend on your needs and whether you are installing a free or premium plugin.
Ready? Let’s get started:
How to install WordPress plugins
The easiest way to install a WordPress plugin is from the backend of your site. WordPress has 55,000+ free plugins available in what’s known as the official plugin repository or directory. This allows you to install any of them from the backend.
Go to Plugins → Add New. Feel free to browse through the list of featured plugins. If you have a specific plugin you want to install, enter it in the search bar.
There are two steps to installing a plugin on your site: installing and then activating it. Installing it uploads the plugin’s files to your server through your WordPress installation. It’s inactive in this state, meaning its functions are not being used by your site. Activating it implements those functionalities on your site.
Fortunately, you can do both directly from the search results for free plugins. Find the plugin you want on your site, and click Install Now.
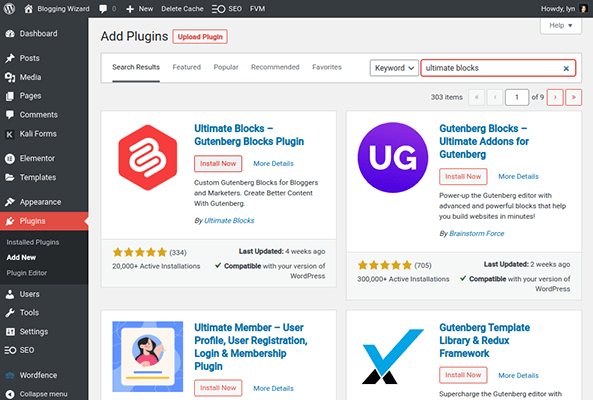
Click Activate after that.

Installing WordPress plugins from a ZIP folder
At some point, you’re going to need a premium plugin. In fact, it’s better to choose the premium version of a plugin over its free counterpart as it’ll come with priority support along with extra features.
After you purchase your plugin, look through your account on the developer or marketplace’s (such as CodeCanyon) website. There should be a download link for your purchase. This will allow you to download the plugin’s ZIP file, which is what you need to upload a plugin through the backend of WordPress. If you purchased a plugin from CodeCanyon, choose “Download Installable WordPress File Only.”
Go to Plugins → Add New → Upload Plugin. Click the Choose File button, and select the ZIP file you downloaded. Then, click Install Now.
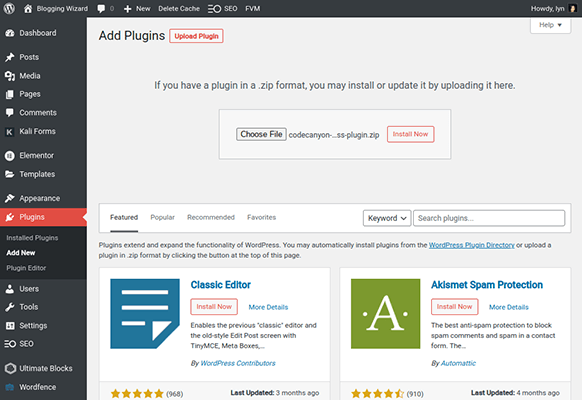
If you receive an error, try unzipping the ZIP file. Sometimes the actual ZIP file you need is inside.
Lastly, most premium plugins require you to verify your license by entering a license key or signing into your account through WordPress. Be sure to do this so you receive the plugin’s latest updates.
Installing WordPress plugins via a file manager
There may come a time where you’ll need to install a plugin by uploading its folder directly to your WordPress installation through what’s known as a file manager. You can also use dedicated file transfer protocol clients.
These are tools that enable you to perform a variety of different actions with your site’s files, including creating and removing folders and files, renaming folders and files, uploading new files, and deleting old ones.
It’s important to note that when you install a plugin through the backend of WordPress, the application uploads the file to the appropriate folder for you. When you suddenly find yourself unable to install a plugin with the first two methods we mentioned, you need to implement this task yourself manually.
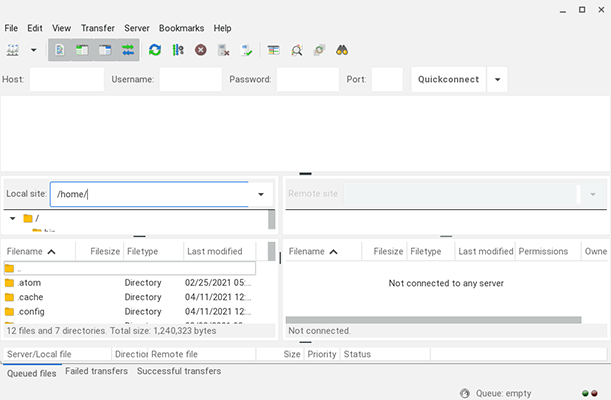
How you access your site’s files is dependent on who you host with. Some hosts have a file manager built into their control panels. Others require you to access them through a third-party FTP client like FileZilla.
Note: FTP is an acronym that stands for File Transfer Protocol. You may see references to SFTP. That is simply the secure version. If you are able to use SFTP, choose that because it is more secure.
With hosts that have their own file manager, you should be able to find a folder named “public_html”. This is typically where your WordPress files are located.
If you need to use FileZilla, you’ll need to get your FTP details from your host. In FileZilla, this is the Host FTP address, your username and password, and a port number. These can be seen in a row underneath the top menu. Click Quickconnect once you enter your site’s FTP details.
Whatever method you use, go through your files until you find a folder with folders named “wp-content” and “wp-admin” in it. Typically, this is under a folder named “pubilc_html,” but you may also need to access a folder named after your database prefix. It depends on your host.
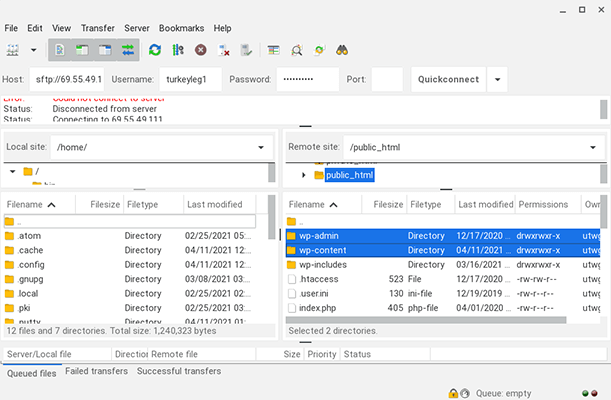
Open the wp-content folder, then open the Plugins folder inside. If you already have plugins installed here, you’ll notice they don’t use ZIP folders. This means you’ll need to unzip your plugin’s ZIP folder until you find the main plugin folder. It’ll typically be by itself and named after the plugin verbatim.
Upload this folder to your site’s Plugins folder to install the plugin. If you’re using FileZilla, you’ll need to use the panel to the left of the panel that contains your computer’s files to find the plugin folder, then drag it over to your site’s Plugins folder in the right panel.
It’s just a matter of going to the Plugins page on the backend of WordPress, and clicking Activate to fully activate the plugin on your site after that.
Note: You can download free plugins directly from WordPress.org if you’re having trouble installing plugins from the backend.
Wrapping it up
That wraps up our guide on how to install a WordPress plugin.
Now, the steps for installing a WordPress theme are fairly similar. But we have a dedicated tutorial on how to install a WordPress theme if you need it.
Need help deciding which plugins to install on your WordPress website? We’ve got plenty of posts to help you out: