How To Create An XML Sitemap For Your WordPress Website

Making your website easy to navigate is not only good for the user experience. It also helps search engines understand what your website is all about. In turn, this means your WordPress site is crawled properly, indexed in relevant search results, and appearing on page one of Google.
And so the cycle continues.
The problem is, it doesn’t matter how easy it is to navigate your website if you don’t tell search engines how to rank it for users.
And seeing as how most people never scroll past the first page of Google, if you’re on page 2 or beyond, you’re pretty much out of luck.
That’s why today we’re going to show you how to create an XML sitemap for your WordPress website to help you get indexed accurately and ranking in the best search results possible. And the best part is, it’s super easy!
So, let’s get started.
What is an XML sitemap?
An XML sitemap acts like a roadmap of your website. It shows site crawlers where your site’s most important content is and helps them to identify the structure of your website.
Of course, crawlers can index your website without an XML sitemap. However, the sitemap speeds up the indexing processing and ensures your site ranks in the right search results.
Not to mention, Google recommends people have an XML sitemap because:
- Sitemaps help smaller websites with limited content and very little internal linking rank higher
- Websites with no external links leading back to them may go unnoticed by crawlers if they don’t have a sitemap
- Large websites with lots of content may not be fully crawled and indexed because they have “too” much content
- A proper XML sitemap will help any website with rich content or a spot in Google News show search engines additional information that will help them rank higher
There’s a lot that goes into SEO and ranking higher in relevant search results. That said, having an XML sitemap on your website helps. And since it’s so easy to create one, there’s no reason not to do it.
Let’s take a look at how to create an XML sitemap for your WordPress website.
How to create an XML sitemap in WordPress
There are several ways to create an XML sitemap for your WordPress website. However, we’re going to show you how to do it using the most popular SEO plugin in the market: Yoast SEO.
Step 1: Install and activate the Yoast SEO plugin
The first thing you need to do is install and activate the Yoast SEO plugin on your WordPress site. To do this, go to Plugins > Add New in your WordPress dashboard.
Search for ‘Yoast SEO’ and click Install Now.
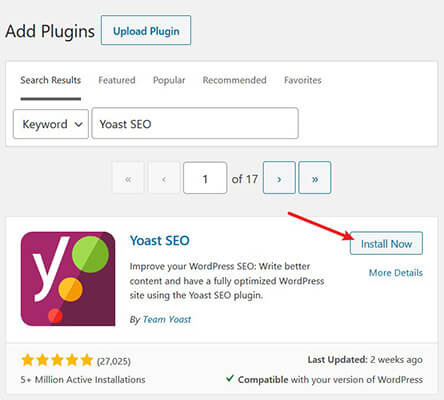
Then, click Activate so the plugin will be ready for use.
Step 2: Enable XML sitemap creation
Once Yoast SEO is installed and activated on your WordPress website, it’s time to create an XML sitemap.
To start, go to SEO > General in your WordPress dashboard.
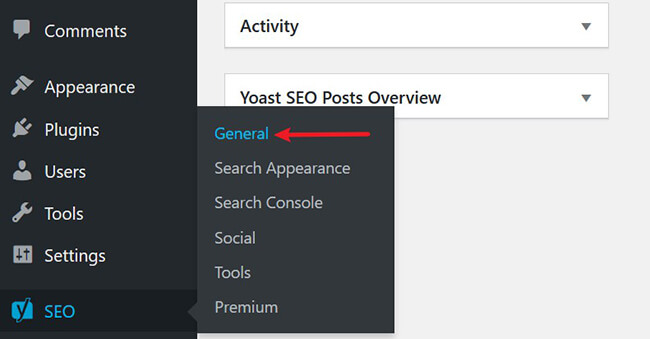
Then, click on the Features tab and find the feature labeled XML sitemaps. Toggle the feature on and let Yoast SEO automatically create an XML sitemap of your entire website.
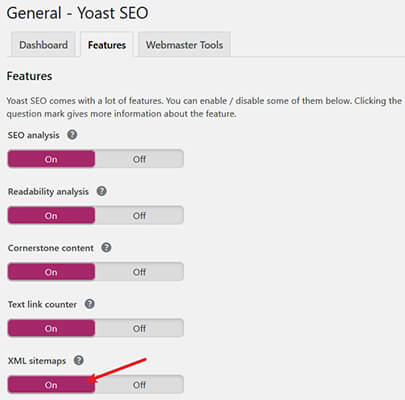
Click Save to save your changes.
Step 3: View your newly created XML sitemap
If you want to see your website’s XML sitemap, click on the help icon near XML sitemaps and then on the link labeled See the XML sitemap.
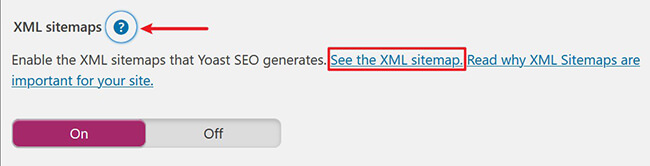
When you do, you’ll see something like this:
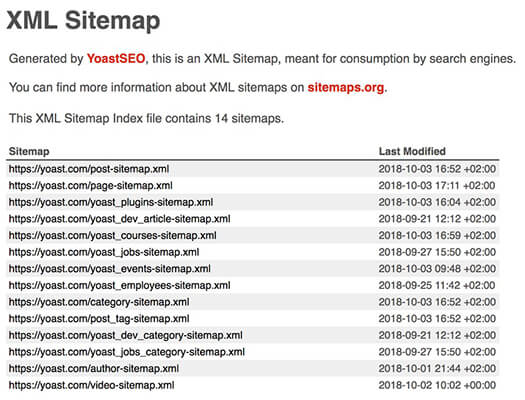
If you click on the available sitemap (if there are more than one, click on the most recent) you’ll notice a few things:
- Available URLs in the sitemap that crawlers will see, index, and rank
- A date at the end of each line telling Google when the content was last updated
Remember, most XML sitemaps are limited to 50,000 URLs. If your website has more than this, it will be necessary to split the sitemap into two or more sections.
In an effort to keep your site loading blazing fast, Yoast SEO limits the number of URLs to 1,000, meaning large websites will need multiple separate sitemaps to show search engine crawlers.
Step 4: Ensure all content is seen in search results
Once Yoast SEO has created an XML sitemap of your website’s content, you should check to make sure all your site’s content is being included in search results. After all, you want potential site visitors to see everything there is to see about your website before they click through.
To do this, go to SEO > Search Appearance. Then, click on the tabs labeled Content Types first and then Media.
For our example, we’ll make sure all posts are included in the sitemap by toggling on the feature labeled Show Posts in search results.

Make sure to include your site’s pages, media, and product pages (if you run an online store) in search results too.
Step 5: Make Google find your XML sitemap
It’s not enough to create an XML sitemap of your website and call it a day. If you want Google to find your XML sitemap faster, you’ll need to add it to your Google Search Console account. But don’t worry, this is simple to do and free too!
Once inside your Google Search Console account, go to the Sitemaps section and click Add a new sitemap.
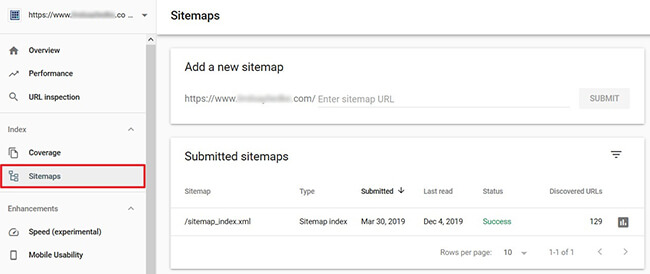
From there, add the URL of your sitemap and click Submit. If your sitemap has already been added, you’ll see it on this screen as well.
If you click on your submitted sitemap, you’ll be taken to a screen that looks like this:
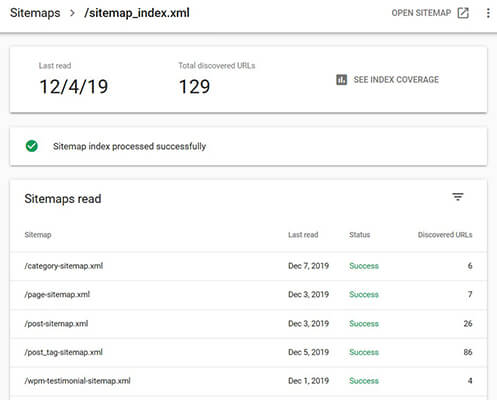
Here, you’ll find information such as:
- Number of discovered URLs
- Sitemaps that have been read
- The date of the last sitemap read
- Whether the sitemap was indexed properly
If you click on the SEE INDEX COVERAGE link, you’ll also see if there are any errors negatively affecting your site’s ability to rank accurately.
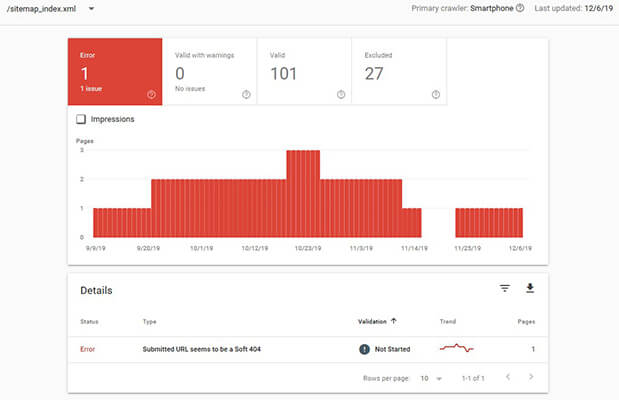
If there are any errors, you also have the option to fix them right away to reduce the damage an error is having on your search rankings.
Additional XML sitemap plugins for your WordPress site
While Yoast SEO is likely the best XML sitemap plugin option around, it’s worth mentioning the other solutions available:
- All in One SEO Pack – Submit your sitemaps, including image ones, to Google and Bing to improve your SEO. It’s as simple as clicking one button and letting the plugin do the rest. From there, you’ll have control over which content to include in the sitemap, how often to update the sitemap, and much more.
- Google XML Sitemaps – This plugin will help you create sitemaps that can be submitted to Google, Bing, Yahoo!, and Ask.com. You can also create an HTML sitemap for site visitors to see when they land on your website, which helps with navigation of your site’s content. Most notably however, you can prioritize your site’s content and assign the order in which you want it crawled and indexed. This ensures your most important content is always indexed and ranking in search engines.
- Simple XML Sitemap Generator – For those in need of a simple XML sitemap creator, this is the solution for you. This plugin works right out of the box and automatically updates your sitemaps whenever content is updated on your site.
And, don’t forget that Yoast isn’t the only SEO plugin on the market. Be sure to check out Blogging Wizard’s roundup of WordPress SEO plugins for alternatives.
Final thoughts
Proper search engine optimization takes a lot more than creating an XML sitemap on your website and submitting it to Google Search Console. But the truth is, this simple strategy can help improve your search rankings immediately. And thanks to plugins like Yoast SEO, you don’t have to have any technical knowledge to create a sitemap for your website.
So, if you’re ready to give your SEO efforts a boost, drive more traffic to your website, and increase conversions without having to do a lot of work, try creating an XML sitemap for your WordPress website today. It only takes a few minutes from start to finish, but the results will last a lifetime.