How To Add Mobile Responsive Tables In WordPress

Tables are powerful things. If you search around the Internet, you’ll find all kinds of stories of people basically automating their entire job by using Excel and tables. That to say…tables have the potential to do some nifty things for your website.
But WordPress has yet to build Excel into the core…so how can you harness the power of tables for your WordPress site? With a plugin called wpDataTables.
It can help you create all kinds of tables for your WordPress site. You can build tables from scratch using the plugin’s Excel-like builder, or you can import tables directly from Excel or Google Sheets with just a couple of clicks.
Then, you can display, manipulate, and filter those tables in a ton of cool ways.
In this post, I’m going to do two things:
- Give you a detailed tutorial for creating a filterable product comparison table with wpDataTables. While this is by no means the only use case, it is one of the most popular.
- Tell you more about the plugin’s features, as well as some of those other use cases.
By the end of it, you should know not only how wpDataTables can help your site, but also how you can create your very own filterable data tables!
wpDataTables features: Why it’s the tool for the job
Let’s start at the beginning:
Bringing your data in.
Without data in your tables, they aren’t very helpful, right? wpDataTables lets you bring in data in two ways:
- From a link (Google Sheets) or a file upload (JSON, CSV, Excel, etc.)
- Via an in-dashboard table constructor where you enter data in an Excel-like interface
You can also upload a file as a base for your table and then edit it further inside your WordPress dashboard.
Once you get your table uploaded, you can display it on the front-end using a simple shortcode. Your tables are responsive (unless disabled), so they’ll always look great.
And you can also add detailed filtering options so your readers can drill down to just the information they need. This filtering is especially important because wpDataTables is built to be able to handle huge tables with millions of rows.
You can style your tables by using the plugin’s built-in color and font settings or through custom CSS that’s easily added inside the plugin’s interface.
And if you want to manipulate your data, you can easily build a variety of charts based on your tables. You can even go further and create detailed Word or Excel reports based on the data in your tables (though this requires an additional premium add-on).
That’s a ton of abstract features, though! So let’s go hands-on so you can see how these features play out in the real world.
Step by step: Creating a filterable product comparison table
Ok, let’s get into the promised tutorial. Here’s exactly how you can use wpDataTables to create a filterable product comparison table on WordPress. As I mentioned, this is by no means the only use case for wpDataTables. But it’s definitely a popular use for the plugin.
If you’re running any type of affiliate site, a product comparison table allows you to help your readers find the product that fits them best (which means a higher conversion rate and more money in your pocket!).
But before we get started, we need some products to compare, right? So what should we look into? I recently bought a pair of noise canceling headphones, so that seems like a good concrete example to use.
We can use the product comparison table to:
- List the price
- Specify the type of noise cancellation
- List the brand
- Add a Buy It Here link
Of course, when you use the plugin, you can use your own criteria to compare products. We’re just talking examples here.
Let’s get started…
Step 1: Install and activate wpDataTables
As is normally the case with WordPress plugins, your first step is to install and activate wpDataTables. Once you’ve got that done, there’s nothing you really need to configure right away.
We’ll come back to some optional styling options later on. But for now, you can jump straight into creating your product comparison table.
Step 2: Import data and set basic options
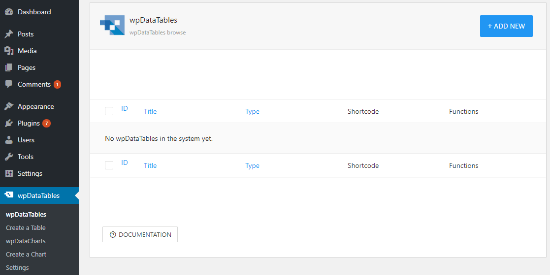
Now that you’ve got the plugin installed, you can create your first table by heading to wpDataTables → Add new:
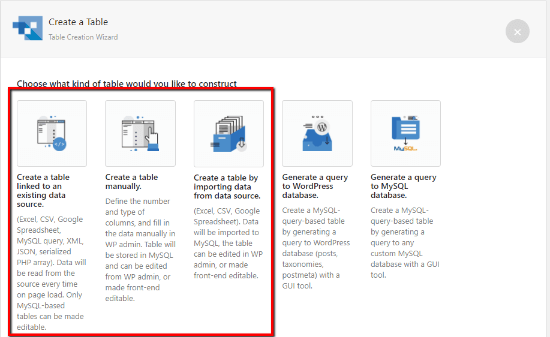
Next up, you need to choose what kind of table you want. You have several options, but the most relevant for our purposes are:
- A table linked to an existing source
- Create a table manually
- Import from another source
I like using Google Sheets, so for this example I’ll import a table from there and then tweak it later on as needed using WPDataTable’s editing interface.
Next up, you can verify the import columns (assuming you opted to import your table):
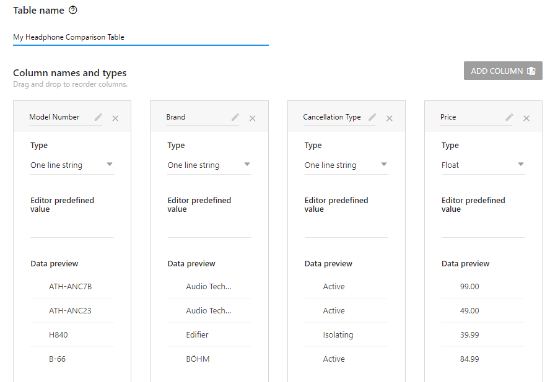
Once you verify that things are correct, you can continue on to the next screen.
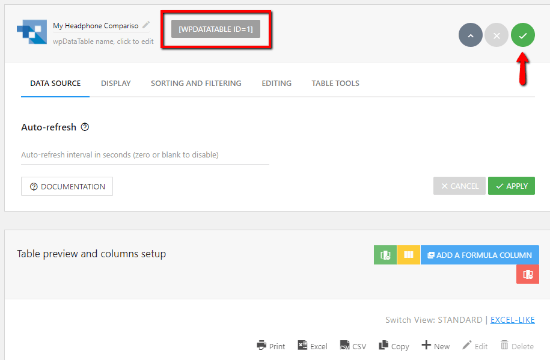
There, you can configure some basic settings at the top of the table if needed. These settings deal with:
- Basic display details (e.g. whether or not to show the title)
- Responsive design
- Global sorting and filtering
I’ll touch on some of those configurations in a second. But for now, you’re free to just hit Save and grab the shortcode:
Step 3: Add the shortcode where you want your table to display
And that’s it! You have a filterable product comparison table. To display it on the front-end, all you need to do is grab the aforementioned shortcode and add it to the post or page where you want your table to display.
Then, on the front-end, you should see your table:
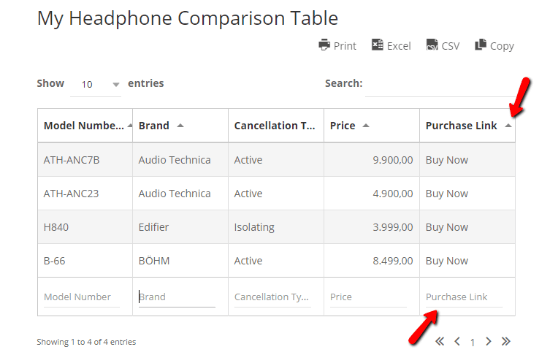
Cool! It’s there. But you’re not quite finished. See, at this point, literally everything is filterable. That makes sense for the first four columns of our example, but it’s a little weird to make the Purchase Link column filterable.
So…let’s fix that!
Step 4: Tweak your individual table columns
Head back to wpDataTables interface for your table.
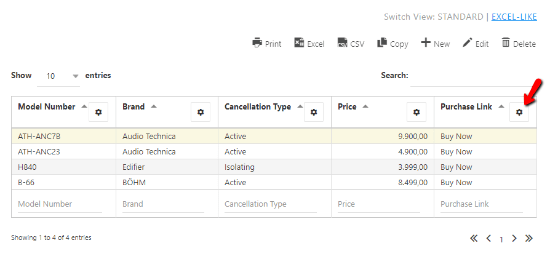
Then, if you scroll down, you should see the Table preview and columns setup area.
In addition to letting you add new entries or edit existing ones, this interface also lets you customize how each column functions by clicking on the Gear icon for each column:
To remove filtering on the Purchase Link column, you just need to click that gear icon, head to the Filtering tab, and toggle it off:
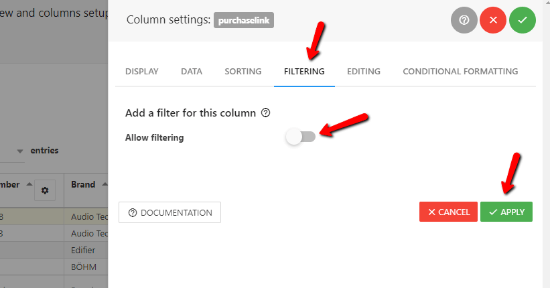
You can also turn off sorting from the Sorting tab.
And that took care of the big issue! But let’s make our example table even better.
Right now, to filter our table, users need to actually enter their own search term into each column’s filter. While that works…it’s not very user-friendly.
So, let’s make things easier for them by allowing them to:
- Choose the brand from a dropdown
- Choose the cancellation type from a dropdown
- Select different price ranges
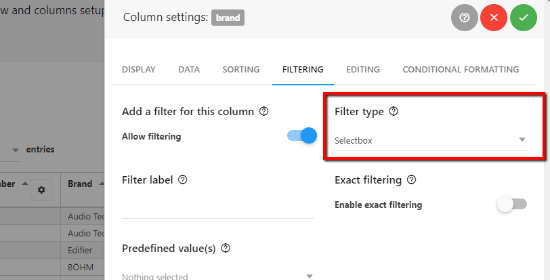
To solve the first two, you just need to change the Filter type to Select box:
And to solve the third one, change the Price column’s Filter type to Number Range:

Put it all together and you’ll get something like this on the front-end:
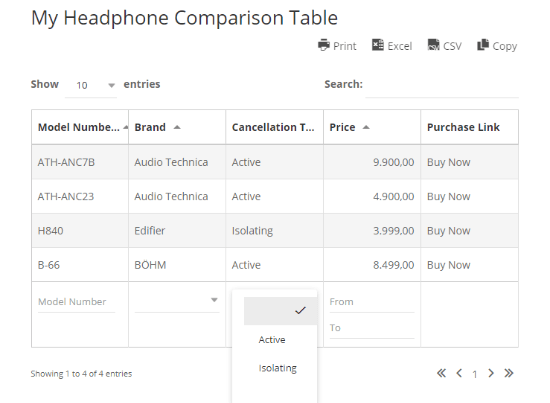
Now, visitors can choose from dropdowns and enter their own price range to really take advantage of the filtering.
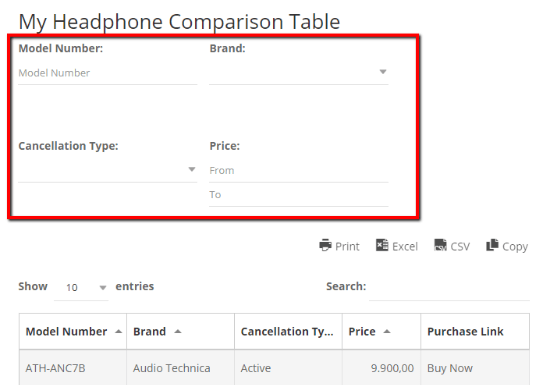
Note – if you’re wondering what it looks like to add even more filtering, here’s a peek at the “Filter in Form” option that you can enable from the top Sorting and Filtering tab:
Another neat thing you can do in the Display tab of each column’s settings is add custom CSS classes to each column. This is especially helpful if you want to add, say, custom styling to just the Purchase Link column to create a button or otherwise draw attention.
You can also add conditional formatting, which allows you to get creative and, say, highlight different items based on criteria that you specify.
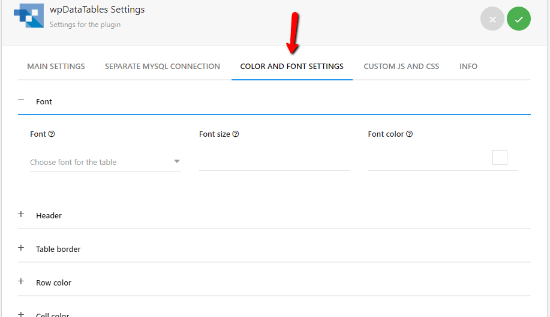
Step 5: Change up colors and fonts (optional)
Remember how I glossed over wpDataTable’s default settings? Here’s where they might come in useful.
If you’re not happy with the default look of your table, you can go ahead and change up the colors and fonts by going to wpDataTables → Settings → Color and font settings:
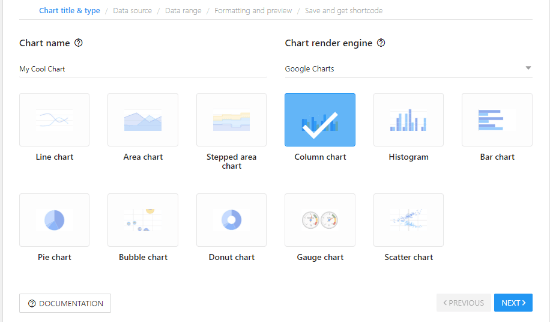
Step 6: Create a chart (optional)
One more nifty feature you may or may not want to incorporate into your product comparison tables are custom charts and graphs. While the noise cancelling headphones example doesn’t really benefit that much, I can certainly think of times when a chart might come in handy.
wpDataTables makes it super simple to create a chart from your existing table. All you need to do is go to the Create a Chart in your dashboard sidebar. Then, give it a name and pick your render engine and chart type:
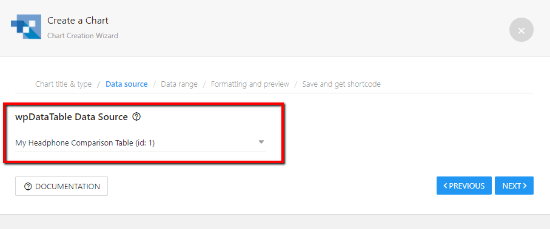
On the next page, choose the table you’d like to base your chart on:
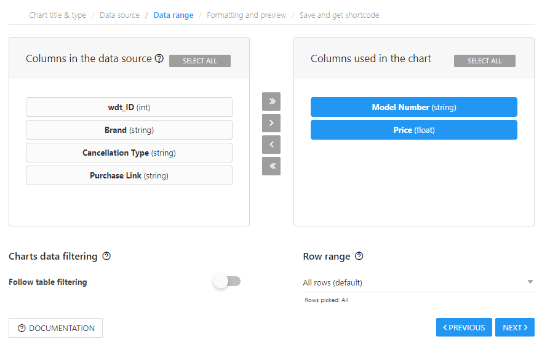
Then, add some columns to use in the chart. For this, I’ll use a combination of Model Number and Price (you need to pick at least two columns for the chart to work):
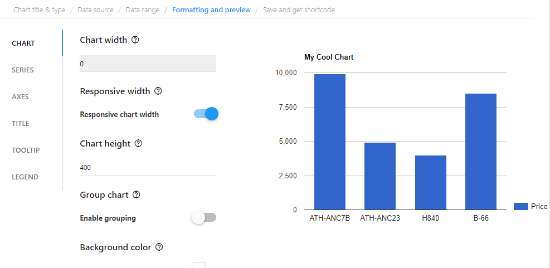
On the next screen, you’ll get a live preview, as well as the ability to add some formatting:
Then, you just need to save your chart and grab the shortcode to display it on the front-end. Put it together with your filterable product comparison table and you can give your readers a detailed overview of all of the products you’re comparing.
Other uses for wpDataTables
Ok, I’ve spent the bulk of this article showing you how you can create a filterable product comparison table using wpDataTables. But that’s far from the only use for this plugin.
Because it allows a variety of field formats and custom CSS styling, you can use it for all sorts of things like:
- Creating a schedule for your sports team, band, or anything else that requires listing event times and locations
- Building a pricing table to display your own product information
- Listing available apartment units
- Displaying a filterable list of store/retail locations
- Creating a sortable catalog of all of your products
Really…if you can do it with a table, you can do it with wpDataTables. There’s heaps of creative niche uses that you can think up yourself.
For example, I use a table on one of my sites to help people understand the cost of living in Vietnam. It’s essentially a database of prices for common goods. Readers can filter by type, English name, etc.
That to say, tables open up a ton of functionality for your WordPress site. Add on the fact that wpDataTables lets you sort, filter, and search your tables in a variety of helpful ways, and you can use the plugin for all sorts of things.
Wrapping things up
By now, you should know:
- How to create a filterable product comparison table on WordPress
- Why wpDataTables is a great tool for the job
- Some other neat ways to use tables to enhance your WordPress site
Now get out there, build your first table, and start using the power of data and tables to make a more functional WordPress website!
Disclosure: This post is sponsored but our opinions are our own.