How To Use Dashicons In WordPress: A Step-By-Step Guide

It happens to everyone.
You find a theme you like, you install it and spend a few months enjoying the look of your site. But then, after a few months, the theme starts to feel stale. A bit boring.
The only problem is, you don’t want to spend a couple of hours looking for something new. If only there was a way to add a little spice to your theme, a little flare to make it stand out.
Before you throw your hands up in despair, let me show you an easy way to spice up your theme without too much effort, and without adding unnecessary images that could slow down your site.
Enter Dashicons. Dashicons are font icons that were introduced in WordPress 3.8. They are those awesome and cool icons you see when you log into your dashboard. Wouldn’t it be cool if you could add them to your theme as well?
Well, you can and I’m going to show you how.
How can you use Dashicons in your navigation menu?
Let’s start by a simple example. Dashicons are already included in WordPress since version 3.8 but you still need to include them to get them to display properly on the front end of your site; that is, your theme.
Step 1: Make your theme Dashicons ready
To make your theme Dashicons ready first open up your functions.php file (found in Appearance>Editor – by default it will open up your current theme’s CSS file. Go ahead and look for functions.php file and click on it to load it in Editor.)
Step 2: Enqueue the script
Scroll all the way to the bottom and paste these lines of code at the end:
//Enqueue the Dashicons script
add_action( 'wp_enqueue_scripts', 'load_dashicons_front_end' );
function load_dashicons_front_end() {
wp_enqueue_style( 'dashicons' );
}
All right! Now your theme is ready to use Dashicons.
Step 3: Adding Dashicons to menu items
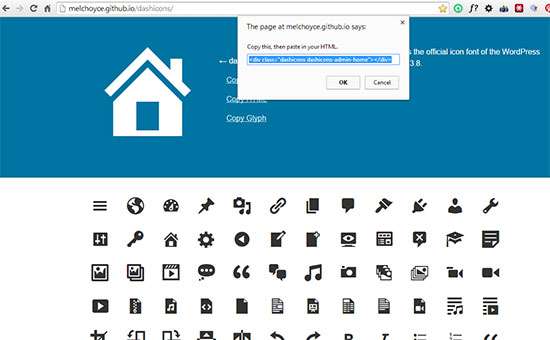
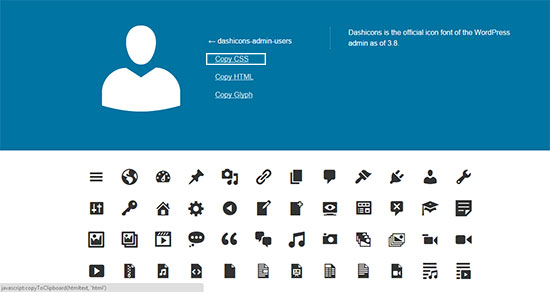
Let’s add a Dashicon for your Home link. Head over to Dashicons website and select the icon you like.
Update: Dashicons were originally available on GitHub.io, but they have since been made available on WordPress.org.
Step 4:
Click on the desired icon (in this case I selected the home icon) and then click on Copy HTML. It will give you a pop-up window with the code you need.
Step 5:
Go back to your WordPress dashboard, click on Appearance > Menus and paste the code right where it says Navigation Label.
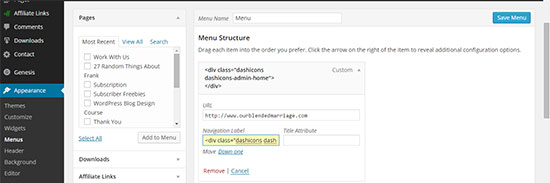
If you still want the word to show up, type it after the closing div bracket.
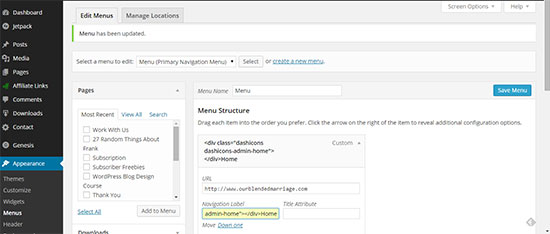
Click on save and load your home page. Your home link should now display a nice, crisp Dashicon.
You can do this for all the navigation menu items or just for home. Just repeat the steps above with the matching icons. That was easy right?
How do you use Dashicons in post meta?
You can go a step further and add Dashicons to your post meta, or in other words add Dashicons in front of author’s name, date, category or tag; depending on your theme and the information it displays.
Since you already enqueued Dashicons in your theme, all you have to do now is open your style.css file (or use Custom CSS editor which is always a better option so you don’t lose the changes once your theme updates!), find the matching selector and add the CSS code.
Let’s say you want to add an icon in front of your name or your author’s name.
Step 1:
First we’re going to pick an icon we’d like.
Step 2:
Then click on it, and this time select Copy CSS. Again, it will give you a pop-up window with the code you need to paste.
Step 3:
Now open up your style.css and find the corresponding selector, in this case – .entry-author. By adding :before and then pasting the CSS code you copied from Dashicons website, the author’s name will have a nice icon in front of it. You also need to specify that you are using the Dashicons font. The modified code looks like this:
.entry-author:before {

font-family: "dashicons";

content: "\f110";
}
Let’s add a bit of styling as well, and now the completed code looks like this:
.entry-author:before {

font-family: "dashicons";

content: "\f110";

color: #f15123;

display: inline-block;

-webkit-font-smoothing: antialiased;

font: normal 20px/1;

vertical-align: top;

margin-right: 5px;

margin-right: 0.5rem;

}
The end result
So what will this look like in the end?
Something like this:

There are so many ways you can use Dashicons – let your creativity take hold and see what you can do.
Putting it all together
Aside from the above examples, you can use Dashicons in your backend to specify different icons for different post types, or you can use them in your post titles, widget titles, or if you are creating a custom landing page you can differentiate between different pages of your site.
Here’s a basic example of what you could use them to create: